Peptide Synthesis for Beginners
Experimental techniques involved in solid-phase peptide synthesis include a range of potential hazards related to both the chemical reagents and equipment employed. The material on this site is intended for researchers who already have training in and familiarity with the principles necessary for working safely in an organic chemistry laboratory.
Appropriate care should be taken in the use and disposal of all chemicals, referencing the corresponding materials safety data sheets, MSDS, as well as relevant policies and procedures set by an individual researcher’s lab and organization. Suitable personal protective equipment, PPE, should be employed at all times, and a certified fume hood used where appropriate. Additionally, following standard safety practices, the researcher should not work alone in the laboratory. The American Peptide Society does not assume any liability for the actions of users of the provided information.
The procedure herein describes manual Fmoc Solid Phase Peptide Synthesis, SPPS. Fmoc is the most commonly employed protecting group for the alpha-amine during peptide synthesis on the solid phase. Alternatives to Fmoc SPPS exist but are not discussed here.
Setting Up
Equipment and supplies needed. See the bottom of this page for an alternative setup.
If this is your first time synthesizing a peptide on solid phase and you do not have access to an automated peptide synthesizer, you will need access to the following:
- Disposable fritted cartridges and caps. For example, empty standard SPE cartridges with 20μ PE frits from Applied Separations can be used. A 3 mL cartridge size is typically good when working with 100 mg of resin and 1 mL of solvent. If you anticipate needing more than 1 mL of solvents or are planning on using volatile solvents, you may want to use a 6 mL cartridge size instead. Because spills occasionally happen, it is a good idea to cover the tray with aluminum foil and/or place your cartridge in a small plastic bag.
- An orbital shaker or any small vortex mixer equipped with a microplate tray accessory. The tray makes it easier to gently agitate multiple cartridges and secure them in place with rubber bands. Note: Magnetic stirring will damage the resin and should be avoided.
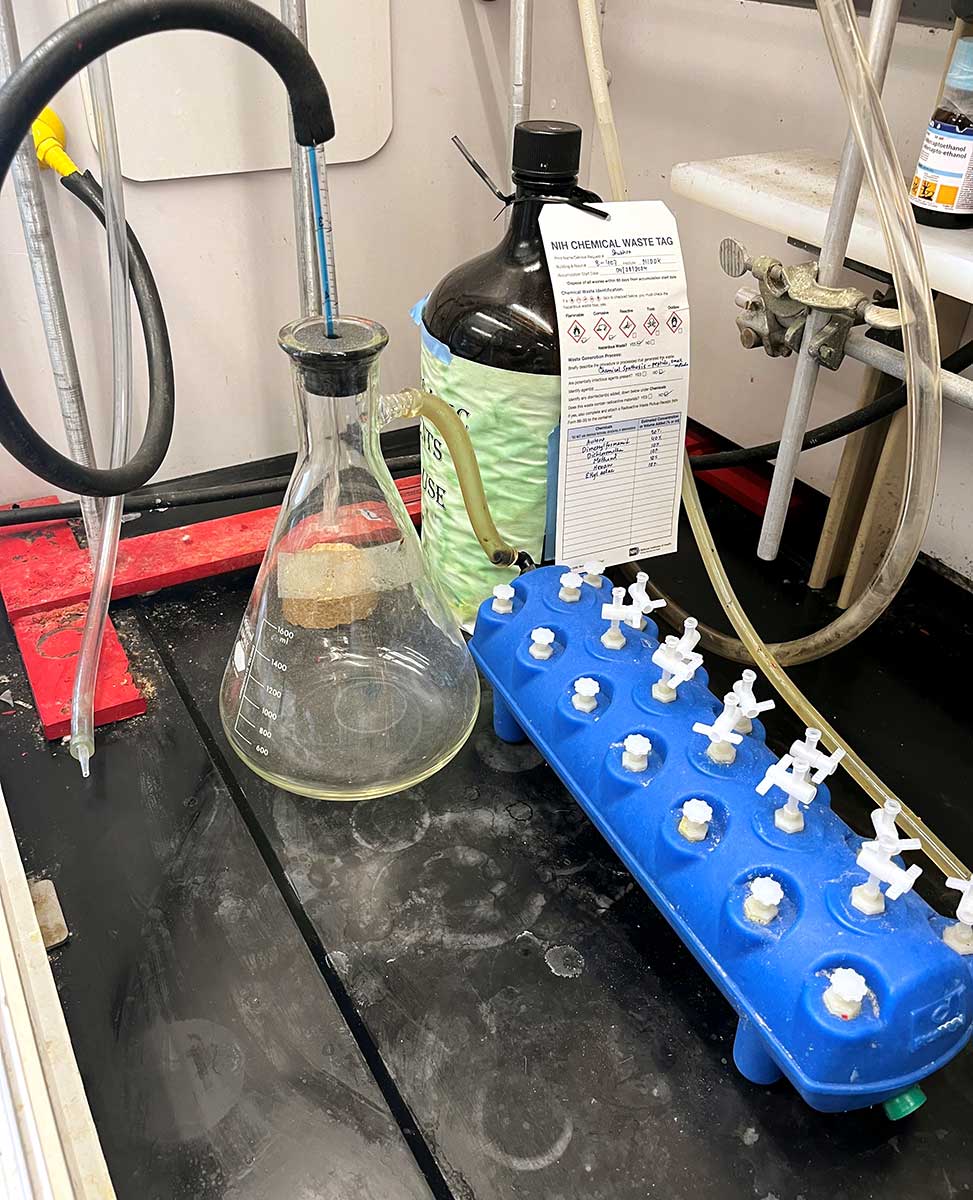
- An Erlenmeyer flask with side arm connected to a waste trap and water aspirator vacuum for draining of the reagents and solvents.
- Access to an LCMS and preparative HPLC for analysis and purification.
- Access to a lyophilizer for freeze-drying of your HPLC fractions.
With a scale of ~100 mg of resin, if you are using resin with high loading, for example 0.6-0.8 mmol/g, and synthesizing a pentapeptide, MW ~ 800 g/mol, you can expect ~50 mg of crude peptide material after cleavage from the resin.
A typical yield after purification for a peptide using standard Fmoc amino acids will be ~30-40%, resulting in ~15-25 mg of pure peptide material at the end of the synthesis and purification.
Depending on your peptide and resin, you might need to adjust the scale of your reaction in the future to get enough material for your desired application.
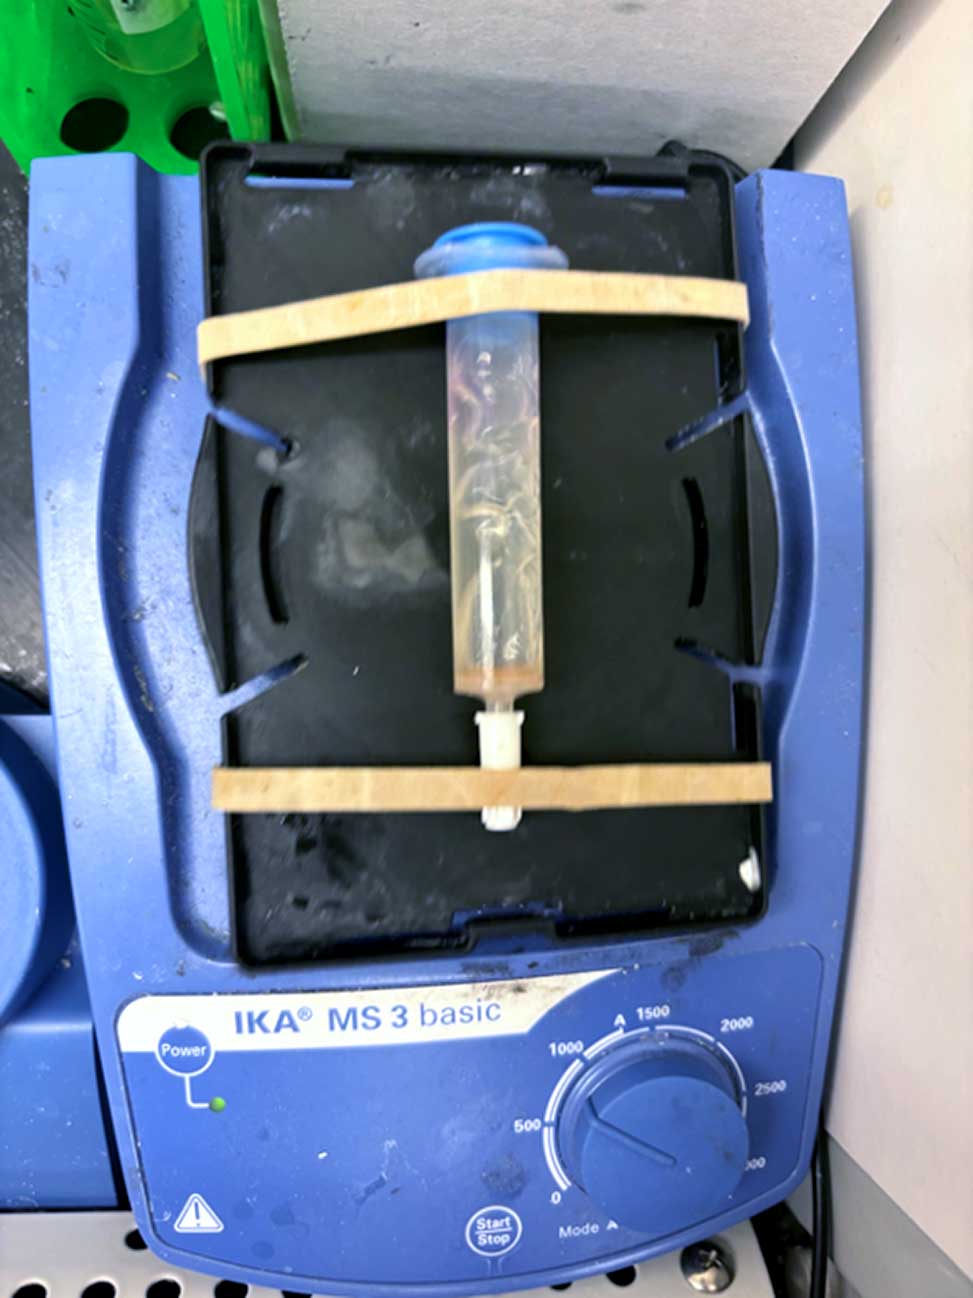
Resin in SPPS cartridge on a vortex mixer equipped with microplate tray
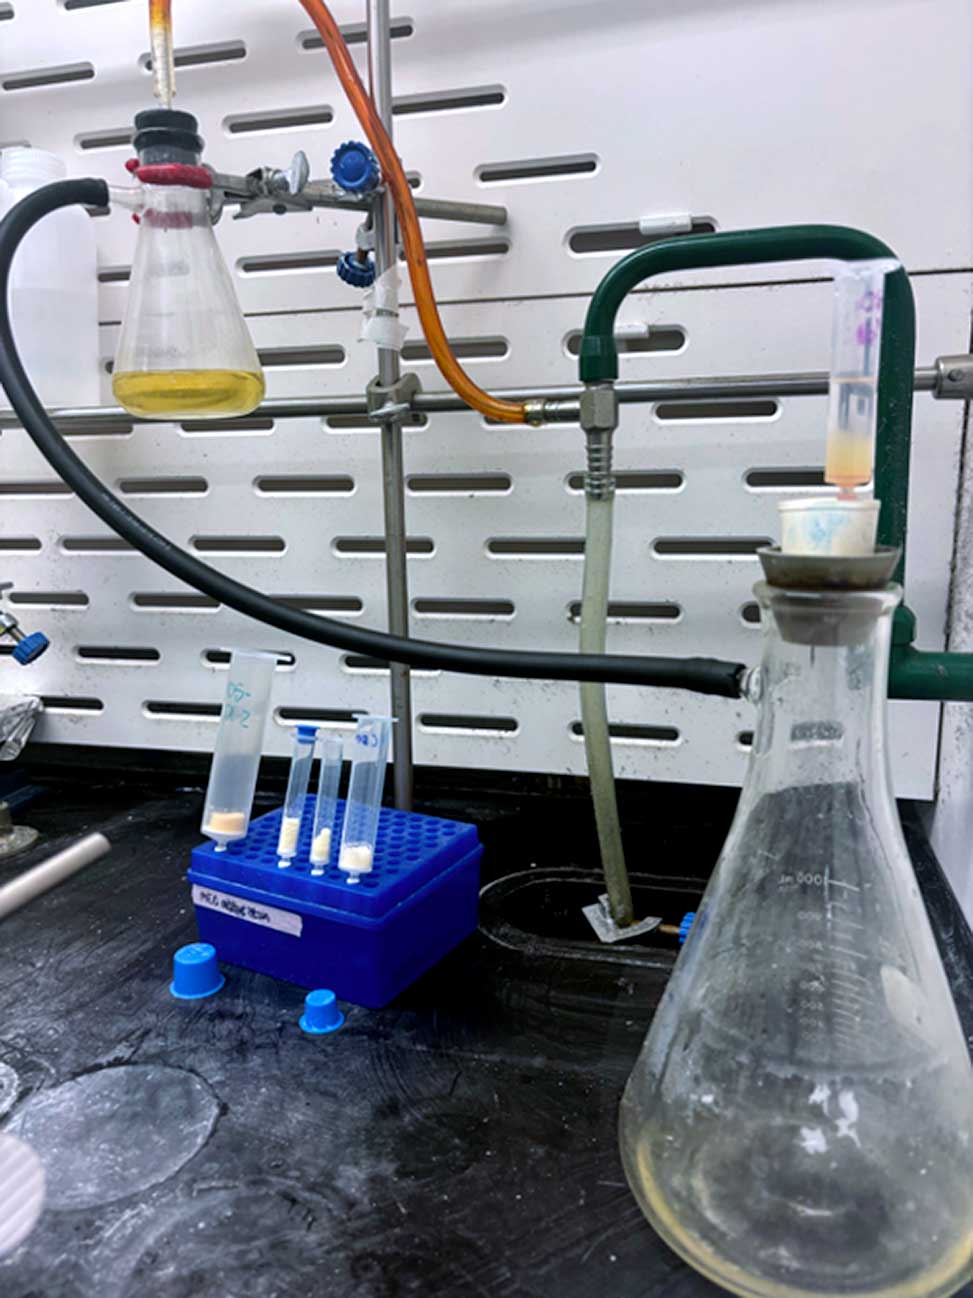
Setup for draining of the reagents and solvent
Alternative Manual Peptide Synthesis Setup
This setup parallels the components shown in the main description, with the chemistry and procedures largely reproduced using the apparatus shown below. The hope is that some users of this site might find certain components or reagents helpful or advantageous based on their unique environment. This setup can be easily adapted to the synthesis of many peptides in parallel.
Necessary Components
Fritted Syringe with Plunger
We typically use a 10 mL syringe from Torviq for syntheses up to 200 micromole scale. Caps to seal the bottom of the syringe to avoid unwanted leakage are also needed. We use AirTite Syringe Caps, #8300018835.
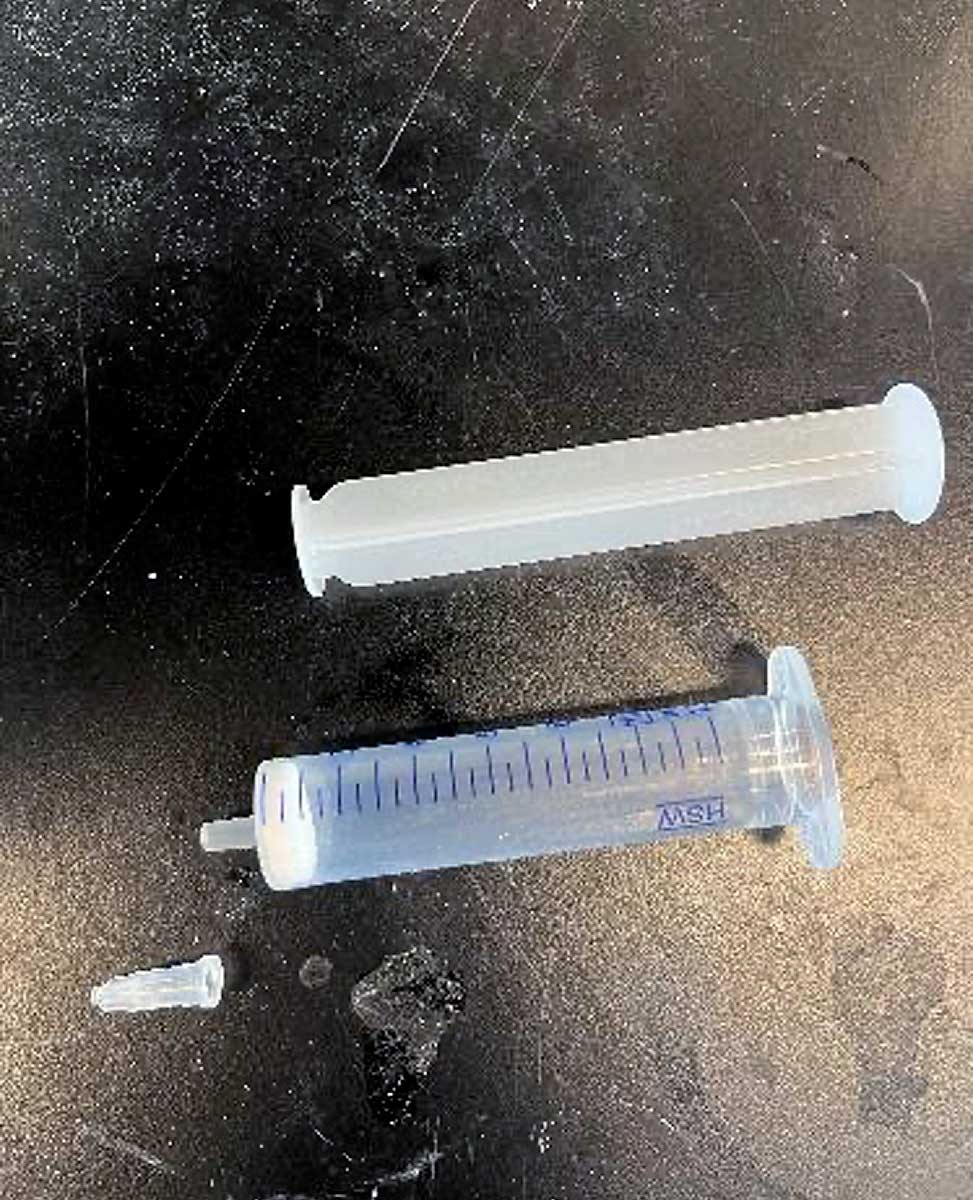
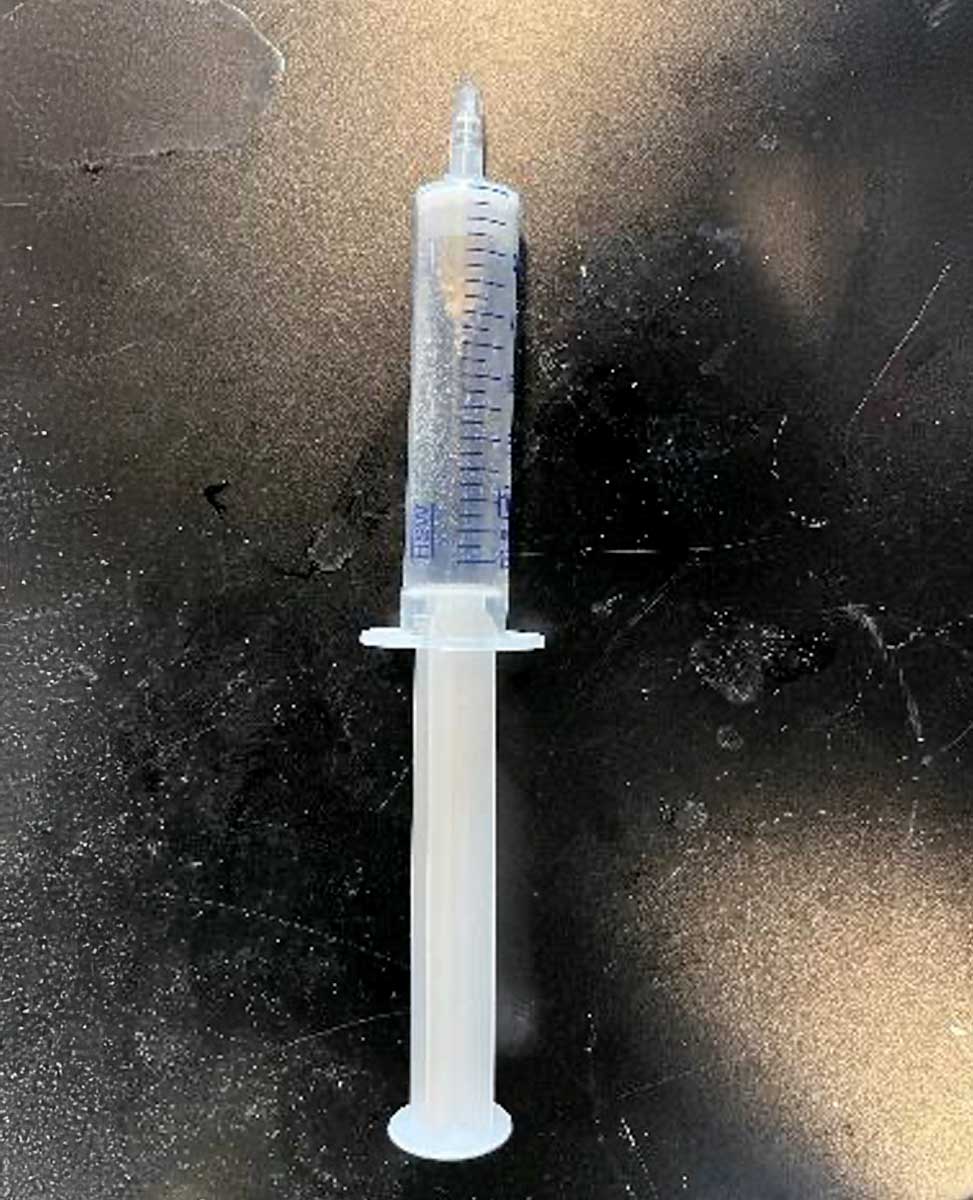
Vacuum Manifold and Vacuum Source for Solvent Aspiration
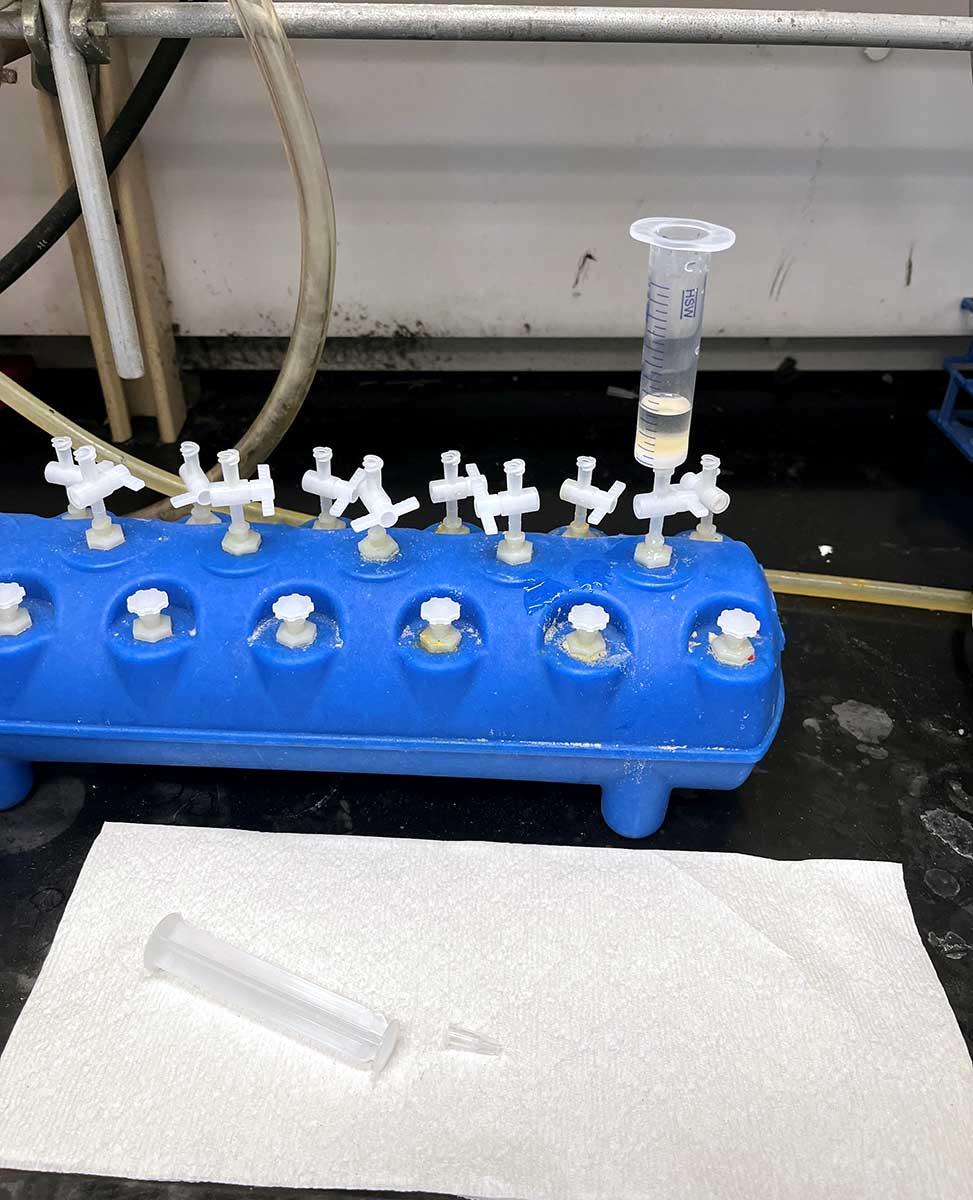
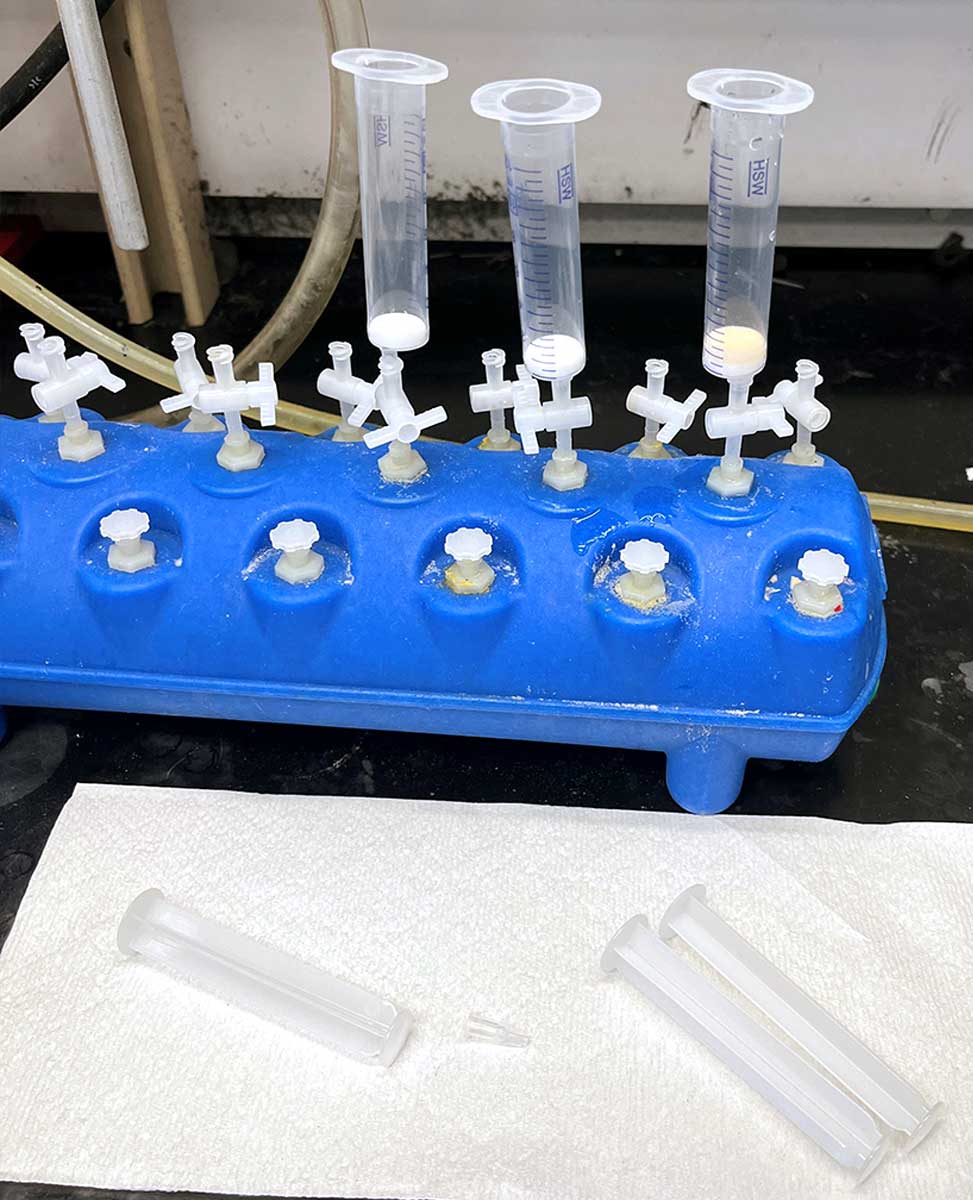
Removing solvent from the fritted syringe can be slow if relying on gravity. We speed the removal of solvent by placing it atop a manifold hooked up to a vacuum source. We have found success using the Vac-Man® Laboratory Vacuum Manifold from Promega. The attached reservoir stably holds common solvents used for peptide synthesis, DMF, dichloromethane, et cetera, but it has not been tested with reagents such as trifluoroacetic acid. A vacuum source should be connected to the vacuum manifold to accelerate solvent removal. As shown below, we connect to a house vacuum, although other vacuum sources should work fine.
Click to view a resin washing video
The vacuum adaptor stopcocks provided with purchase are not stable to organic solvents. These must be replaced with a valve that is table to organic solvents, such as Phenomenex A81213.
Mixing Apparatus
To ensure sufficient agitation of the resin we use a nutating mixer, such as VWR 82007-202. This type of mixing allows for sufficient mixing of resin with small volumes of solutions, deprotection or coupling solutions. We have gone down to 2 mL in a 10 mL vessel without issues.
Click to view a mixing device video
Caution: HBTU is a sensitizer and allergenic and many researchers have developed sensitivities to this reagent. See “Anaphylaxis Induced by Peptide Coupling Agents: Lessons Learned from Repeated Exposure to HATU, HBTU, and HCTU.” Use caution when weighing and transferring this reagent.
The procedure and video below describe peptide synthesis on Rink Amide resin. In preparation for your Fmoc deprotection and Fmoc-amino acid coupling reactions, your resin should be swelled in DMF. If your resin is dry, simply add ~1 mL of DMF to your SPPS cartridge containing ~100 mg of resin and leave it on the shaker for ~30 minutes. After draining the DMF, you can proceed with your Fmoc deprotection/Fmoc-amino acid activation cycle as described below.
For the Fmoc Deprotection Step
Add a solution of 20% piperidine in DMF v/v, ~1 mL, to your resin and allow the cartridge to shake for ~5 minutes.
After 5 minutes, drain the solution and add a fresh solution of 20% piperidine in DMF v/v, 1 mL, to the resin. There is no need to wash the resin at this stage. After 15 minutes, drain the solution and wash the resin with DMF, ~3 x 1 mL.
Note
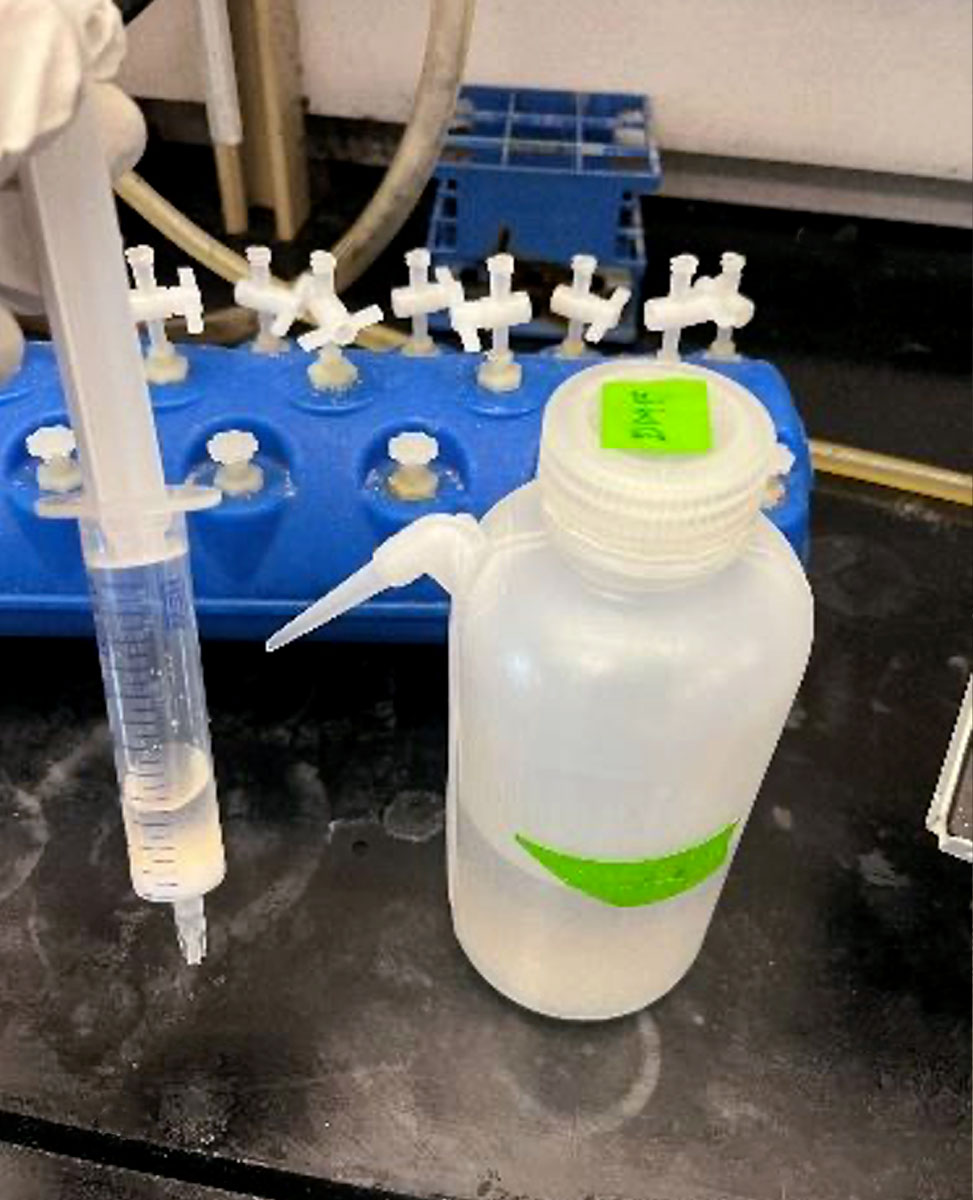
To wash the resin, you can simply add solvent from a wash bottle to the cartridge while it is connected to vacuum. For larger scales, you might want to cap and shake the resin in between washes and/or alternate between DMF, MeOH, and CH2Cl2 solvent washes. Methanol will shrink the beads.
For the Fmoc-Amino Acid Activation Step
Dissolve the Fmoc-amino acid, 3 equiv relative to the resin loading, in 1 mL of DMF in a 20 mL vial, followed by addition of HBTU, 3 equiv, and DIEA, 6 equiv. Leave the reaction stirring for ~5 mins, before transferring the activated Fmoc-amino acid solution to the swollen resin. After ~1h, drain the reagents and wash the resin with DMF, 3 x ~1 mL.
This cycle of Fmoc deprotection and Fmoc-amino acid coupling is repeated until your peptide is completed. At the end of the day, you should dry the resin by washing it with CH2Cl2 and let the residual volatile solvent evaporate. If you are trying a difficult coupling and/or these standard reaction conditions are not working, see “Optimizing a difficult coupling” under the ‘Tips & Tricks’ tab.
Greener Solvents
To consider greener solvents for SPPS, see Greening Fmoc/tBu Solid-Phase Peptide Synthesis.
Click to view a coupling video
The Kaiser Test
The Kaiser test is a qualitative colorimetric test to detect free amines. It is frequently employed in solid phase peptide synthesis to monitor the completion of a coupling reaction. 1, 2 The test relies on a color change produced by a reaction between ninhydrin and a free amine.
You will need three solutions for the Kaiser test:
Solution A is prepared in two steps. First, prepare a 66% w/v solution of potassium cyanide in ddH2O. Second, perform a 1/50 dilution of the KCN solution in Pyridine, 1 mL of KCN, aq, to 49 mL pyridine.
Solution B is a 5% w/v solution of Ninhydrin in Butanol.
Solution C is a 200% w/v solution of Phenol in Butanol.
The KCN and Phenol accelerate the color change of the Kaiser test.3, 4 To perform the Kaiser test on a resin-bound peptide, simply remove a minimal amount of resin beads with a spatula and place them into a test tube. Add 3 drops of Solutions A, B, and C into the test tube alongside a second test tube with no resin. After adding the reagents, gently heat with a heat gun or in a hot water bath until a color change is observed. Presence of a free amine will correspond to a darker purple-blue color in the test tube with peptide compared to the reference solution.
Click to view a Kaiser Test video
Citations
1. Kaiser, E.; Colescott, R. L.; Bossinger, C. D.; Cook, P. I. Color test for detection of free terminal amino groups in the solid-phase synthesis of peptides. Anal. Biochem. 1970, 34, 595-598
2. Sarin, V. K.; Kent, S. B. H.; Tam, J. P.; Merrifield, R. B. Quantitative monitoring of solid-phase peptide synthesis by the ninhydrin reaction. Anal. Biochem. 1981, 117, 147-157.
2. Troll, W.; Cannan, R. K. A modified photometric ninhydrin method for the analysis of amino and imino acids. J. Biol. Chem. 1953, 200, 803-811
2. Moore, S.; Stein, W. H. A modified ninhydrin reagent for the photometric determination of amino acids and related compounds. J. Biol. Chem. 1954, 211, 907-913
Safety Note:
TFA and several scavengers used in cleavage cocktails are highly corrosive, toxic, and reactive. They should only be used with proper precautions and facilities. Thiol additives such as Ethanedithiol are highly malodorous and should be handled with care.
Cleavage from the Resin
The cleavage conditions will depend on the resin/linker used and on your specific peptide sequence. A common cleavage cocktail for cleaving a peptide from Rink amide resin, if it does not contain Cys/Met, is 95: 2.5: 2.5 TFA: H2O: TIPS v/v/v. It is generally a good idea to perform a test cleavage using a small number of beads before cleaving the entire peptide from the resin, see below. This will allow you to optimize the cleavage conditions if needed.
There are many other scavengers and conditions to try if you notice any undesired side products after LCMS analysis. An excellent quick guide on how to choose a TFA-based cleavage cocktail can be found here. Note that if UV active scavengers are used, such as phenol or thioanisole, these are challenging to remove completely during precipitation steps. They are also likely to be observed in HPLC chromatograms, see “Tips and Tricks.”
Before any resin cleavage reactions, the resin should be washed with CH2Cl2 or a green solvent equivalent. The cleavage cocktail should be made fresh.
Click to view a Test Cleavage video
- Transfer a few beads, such as the tip of a microspatula, to a 1 mL SPPS fritted cartridge containing 200-500 μL of cleavage cocktail.
- After approximately 30 minutes, collect the cleavage solution in a 20 mL vial.
- Evaporate the TFA cleavage cocktail using either a rotovap, a gentle stream of nitrogen or compressed air in a fume hood, or a suitable alternative evaporator.
- Add approximately1 mL of cold ether to the crude cleaved peptide to precipitate it, decant the ether, and dissolve the residual crude peptide in approximately 200 μL of 1:1 MeCN: H2O for LCMS analysis.
Note:
It is best if the cold ether used for peptide precipitation has been in the freezer, -20 ˚C, for > 2 hours. Hold on to the ether and 20 mL vial until you have confirmed that your peptide can be detected by LCMS.
Note:
The ether precipitation may not work for smaller peptides, which may remain soluble in diethyl ether. Do not discard your ether until you are confident you have recovered all of the crude material!
Click to view a Full Cleavage video
- Add 4 mL of your cleavage cocktail to a 20 mL vial and transfer your resin to the vial.
- Gently agitate the vial for approximately 2 hours on a shaker.
- Filter the solution through a fritted cartridge to remove the resin beads, draining the TFA solution directly into a 50 mL falcon tube containing cold ether, about 30 mL. A white precipitate should start to form.
- Centrifuge for 5 minutes, decant the ether, and redissolve the precipitate in MeCN: H2O.
- Freeze and lyophilize if you want to obtain a crude weight, or purify the crude by HPLC directly.
Large, hydrophobic, or aggregation prone peptides can present particular challenges when attempting to dissolve them for purification. Sometimes, a simple mixture of water/acetonitrile will not keep your peptide soluble for long enough to enable purification, as described below. If your peptide does not easily dissolve, or dissolves and later aggregates to form a gel, there are several tips and tricks that you can try out – see “Tips and Tricks” section.
Purifying with an HPLC
The most common method of purification for peptides is using a preparative RP-HPLC with a C18 column and a gradient of MeCN in water, where both mobile phases contain 0.1% of either formic acid, FA, or trifluoroacetic acid, TFA. The specific gradient to use during your purification should be previously optimized on an analytical HPLC or LCMS.
You should look for methods that allow the best separation between your peptide and undesired side products, while eluting your desired peptide about half-way through your gradient. If you don’t know where to start, you can try injecting a small amount of your peptide on the LCMS or analytical HPLC with a gradient of 20-80% MeCN, 0.1% TFA, in water, 0.1% TFA.
If your peptide elutes too early, try a 5-40% gradient; if your peptide elutes too late, try a 40-90% gradient. Some very hydrophilic peptides, such as Octa-Arg, might not efficiently adhere to the stationary phase and will elute with the solvent front–special care must be taken in these cases. Alternatively, some hydrophobic peptides adhere very strongly to the stationary phase, which also requires special considerations, see “Tips and Tricks.”
Once an acceptable gradient has been identified, you can purify your peptide on the preparative HPLC using this gradient. When injecting your peptide on the prep HPLC, make sure to dissolve your crude peptide in a minimum volume of your starting conditions, for example, ~50-100 mg of crude peptide in 2-3 mL of MeCN/H2O, and filter your sample using 17mm Nylon syringe filters.
Analyze the fractions by LCMS or analytical HPLC, combine all fractions that contain your product in similar purity, freeze and lyophilize. If you are using 0.1% TFA in your eluent, you might want to form the HCl salt instead of the TFA salt for some applications. To do so, you can redissolve your purified peptides in 100 mM HCl, freeze the solution and lyophilize again. Repeat this step twice, for a total of three times.
If your crude peptide sample is relatively clean and you have large amounts to purify, you could also consider using reverse-phase flash chromatography for your purifications. See here for an example.
Also, please note that you can do PEC using the technology provided by Gyros Protein, as described here.

